We can put up
posters and charts and
show YouTube videos of the design process, but I have had the most success at guiding third and fourth graders through it with this original "EduProtocol".
"EduProtocols are customizable, frames that use your content to create lessons to help students master academic content, think critically, and communicate effectively while creating and working collaboratively," state Jon Corippo and Marlena Hebern in their new book
The EduProtocol Field Guide: 16 Student-Centered Lesson Frames for Infinite Learning Possibilities.
Whether you are teaching kids how to form complex sentences or how to properly compare and contrast, protocols work. Having been inspired by Jon and Marlena's work, I have developed this road map for students to navigate the design process steps in terms that make sense to them and requires them to think critically along the way.
Our
elementary STEM program focuses on the
Next Generation Engineering standards and this protocol drives student attention to the these three standards.
Students who demonstrate understanding can:
•3-5-ETS1-1. Define a simple design problem reflecting a need or a want that includes specified criteria for success and constraints on materials, time, or cost.
•3-5-ETS1-2. Generate and compare multiple possible solutions to a problem based on how well each is likely to meet the criteria and constraints of the problem.
•3-5-ETS1-3. Plan and carry out fair tests in which variables are controlled and failure points are considered to identify aspects of a model or prototype that can be improved.
Students must start with a driving question, consider available materials as well as constraints and limitations. From there a prototype is sketched and a test is planned. Once the actual object is built it is tested and results are analyzed with students looking for points of failure. The process repeats itself as students get to work on correcting the points of failure, redesigning their prototypes and testing all over again.
So far with my third and fourth graders, I am seeing a whole new level of focus. In the past, despite all of my best efforts to make it serious and scientific, a project like building gliders from straws and grocery bags felt more like crafting than engineering. That has definitely changed with the protocol as time must be deliberately spent on reflection and analysis. With the gliders, utilizing the elements of flight became more important than how rad your glider looked.
Additional attention beyond the protocol is given to learning about variables and testing, as well as evaluating multiple design options. Protocols are in the works for those as well as I am struggling to really develop understanding of those aspects in my students. (
Update: just launched a protocol for understanding and using variables)
Here is the design protocol. The first page is the starter and then multiple copies of the second page are used for each additional generation of the design. This allows our young engineers to track their adjustments over time, but also forces them to really consider
why adjustments are being made and
how they will know those changes made a difference.
A
Google Slides version is available here for you to view, download as PDF, or
make a copy and tweak as you would like. If you share it, great! A mention is appreciated but please don't sell it.
 Design Process Student Protocol
 by
Andy Losik is licensed under a
Creative Commons Attribution-NonCommercial 4.0 International License.
Based on a work at
mrlosik.com.


 Learn how Apple Distinguished Educators empower students to create interactive portfolios, movies, and more"with fun animations, personal illustrations, and customizable shapes"using the Keynote app on iPad. More than a presentation tool, Keynote gives students a powerful way to visually think through stories and ideas.


 I get asked by parents year after year what gifts I recommend that kids will love....and maybe still learn something along the way.
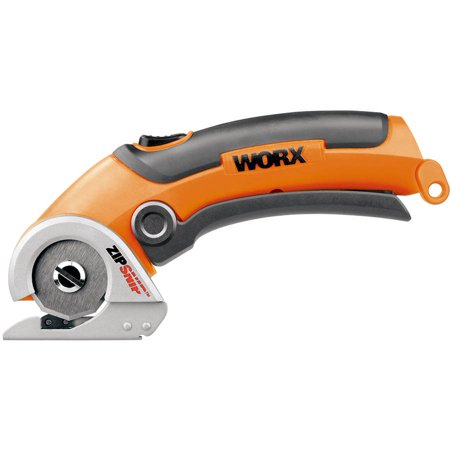 This amazing cutter is the perfect companion to the cardboard construction tools as it is way safer than the typical steak knife that many kids end up using to cut their cardboard boxes down to the desired size. The Zip Snip is very safe. It's not 100% accident-proof but it's close as the blade opening is very small. With a little attention from the child doing the cutting and some adult supervision, it's almost magical how slickly this thing cuts. It's great for all kinds of jobs including opening up plastic packaging and for even cutting gift wrap.
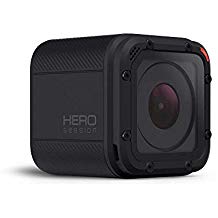 GoPro Hero Session 8.0 MP- $114.00 Amazon.com. If your kids really want a GoPro-type camera it’s best to go with the name brand but for most families (unless your kids are really into filmmaking) the entry level model will be plenty of camera. There are some key points to consider however. There is no viewfinder. You use an app on a phone or tablet to set up a shot or to review clips. The free GoPro apps are really great for framing of shots, reviewing shots, and for doing some quick editing of short clips. The footage files though are really big and will fill up phone and tablet space quickly so you will want a computer to edit longer footage.
 Sphero- The Bolt ($149) with its LED display panel is on a bunch of wish lists this year but the Spark+ ($99) and Sphero Mini ($49) are also more affordable options. The thing about Sphero that I love is that it ties coding to something tangible. When a kid can see a physical object react to their programming it makes coding far more meaningful than just moving objects on a screen. Note about the Mini: They are much more fragile than the others. Keep them on the floor. We’ve had some casualties from them falling off of the tables in STEM. All are available from Amazon.


 Add any extra pieces you want and then assemble the pieces. I added a wedge piece for the base and then under my text, I slid a small rectangle that will help keep my text together. Eventually I will glue that printed text onto the front of the base.


